Accounting Robot Setup within Oval Accounting
The purpose of this article is to provide step-by-step instructions for the setup of the Accounting Robot feature. (Note: This is normally running upon installation but might need setting up or adjusting depending upon your preference).
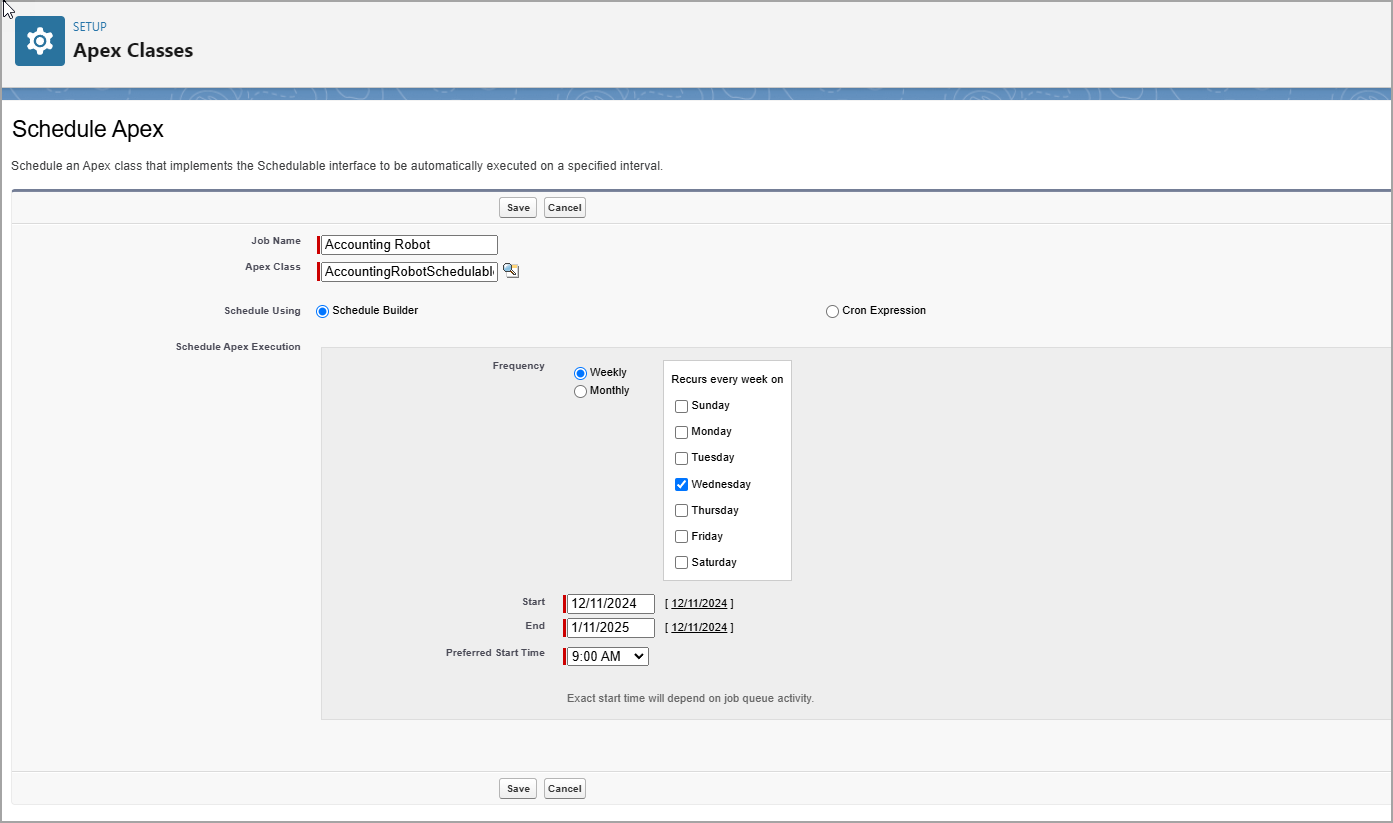
To Setup the Accounting Robot, follow these steps:
- Navigate to Setup within Oval Accounting.
- Navigate to Custom Code>Apex Classes.
- Click on Schedule Apex.
- Enter the Job Name as Accounting Robot.
- Select the AccountingRobotSchedulable Apex Class.
- Select frequency.
- Select the Day(s) when the schedule is to run.
- Enter the Start Date.
- Enter the End Date.
- Select the preferred Start Time.
- Click on Save.

For further assistance on Oval Accounting please do not hesitate to contact us at hello@ovalaccounting.com
Article last reviewed: 2024-12-11